
If you want to create Instagram Reels, TikToks, or YouTube Shorts without paying for expensive software, this guide is for you.
OBS is a completely free tool that lets you record video on your computer. While many people use it for livestreaming, it also works very well for recording vertical video once you understand how it’s set up.
This guide is written for non‑technical users. You don’t need prior experience. Everything is explained in simple terms, with clear steps you can follow.
Part 1: What Is OBS?
OBS stands for Open Broadcaster Software.
Despite the name, OBS is simply a free program that allows you to record video using your camera, your screen, or both at the same time. It does not add watermarks, it does not expire, and you can use it for as many recordings as you want.
OBS is open source, which means it is built and maintained by a community rather than a company trying to sell upgrades or subscriptions.
One honest heads‑up: OBS looks a bit strange when you open it for the first time. The interface can feel overwhelming, and many people close it immediately because they assume it is too complicated.
The good news is that OBS is built around just a couple of important ideas. Once you understand how scenes and sources work, everything starts to make sense. After that, OBS becomes a flexible tool you can use to record talking‑head videos, tutorials, presentations, and vertical content for social media.
Part 2: How to Download OBS on Mac and Windows
OBS works on both Mac and Windows computers.
To download it, go to obsproject.com and click the Download button. Choose your operating system and install the app the same way you would install any other program.
When you open OBS for the first time, it may show you a setup assistant or ask a few basic questions. You can accept the default options. You do not need to adjust anything yet.
Part 3: What Is a Scene?
A scene is a layout.
You can think of a scene as a container that holds everything you want to show in a video. Each scene represents one setup. For example, you might have one scene for vertical videos, another for screen recordings, and another for presentations.
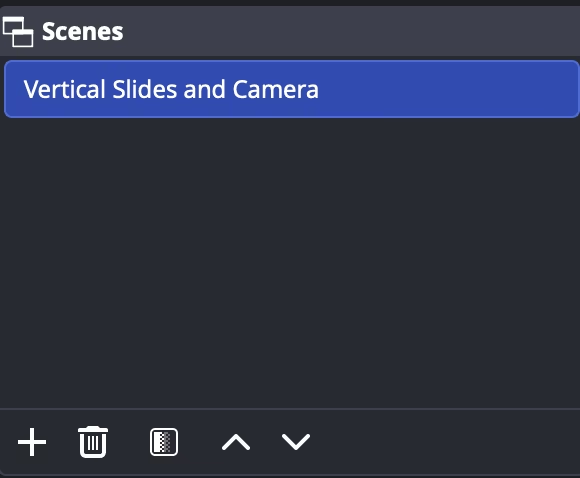
Nothing appears in your recording unless it is inside a scene. For vertical content, you will usually start with a single scene and build everything inside it. It’s good to name your scene what it is. Here is an example of a scene called “Vertical Slides and Camera” because the scene is a vertical video, that included a slideshow and a camera view.
Part 4: What Is a Source?
A source is anything that appears inside your scene.
If a scene is the container, sources are the actual pieces that make up your video. Each source can be moved, resized, layered, or hidden depending on what you need.
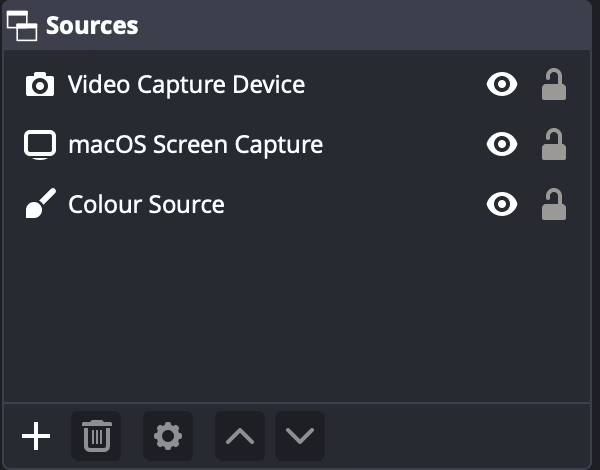
Everything is a source. From the videos to the background image or colour on your video. Here is an example from that same Vertical Slides and Camera Scene that includes the Video Capture Device (a webcam), the macOS Screen Capture (the slideshow), and a colour source which was a green background.
Video Source (Your Camera)
A video source is your webcam or external camera. This is what shows your face on screen. Once added, you can drag it around, resize it, and place it wherever it feels comfortable within your vertical layout.
This is the main source most people use for Reels, Shorts, and TikToks.
Screen Source (Slides, Websites, or Apps)
A screen source records what is happening on your screen or within a specific app. This is useful if you want to show slides, walk through a website, or explain something visually while you talk.
You can place your screen recording behind your camera or position them so both are visible at once.
Colour Source (Your Background)
A colour source creates a solid background. This is extremely useful for vertical video because it fills empty space and prevents black bars on the sides.
You can choose any colour you like. Many people use a neutral colour or a brand colour. This source usually sits at the bottom, underneath everything else.
Part 5: Setting OBS Up for Vertical Video
Vertical video is taller than it is wide, like a phone screen. By default, OBS is set up for horizontal video, so a few adjustments are needed.
First, you change your video layout so it matches a vertical format commonly used for social media. Once that is done, the preview window will look tall instead of wide.
The most important setting here is the canvas size. The canvas is the frame your video is built inside.
For vertical social media videos, set the canvas width to 1080 and the height to 1920.
Once you apply this change, the preview window in OBS will immediately turn vertical. It should now look like a phone screen instead of a wide computer monitor.
Next, add a colour source and stretch it so it fills the entire frame. This becomes your background and acts as a clean base layer for your video.
After that, add your camera and any screen sources you need. You can click and drag them around until everything feels balanced. OBS makes this very visual, so you can see exactly how your video will look.
If your camera feed looks awkward or too zoomed in, use the crop option instead of stretching it. Cropping removes unwanted edges while keeping your image looking natural. Stretching can distort your face and make the video feel off, especially in a vertical layout. You can find the crop option under “Filters” when you right click on your video source.
Part 6: Exporting Your Video and Making It Easy to Upload
When you finish recording, OBS may save your video in a format that is not ideal for social platforms.
To fix this, you can use the built‑in remux feature to convert your recording to MP4. MP4 files work on Instagram, TikTok, YouTube, and almost every editing app.
This process does not reduce video quality. It simply changes the file format so your video is easy to upload and share.
Once the remux is complete, your vertical video is ready to go.
Final Thoughts
OBS is not flashy, and it does not hold your hand. But once you understand how scenes and sources work, it becomes a powerful free tool for creating vertical content.
That’s How We Created This Video
Sam spent an evening learning OBS for vertical content. You can watch this practice short on why Cybersecurity is important for small businesses.
Feeling stuck trying to record Reels or Shorts without expensive tools?
At Pixel Bridges, we help creators set up simple, free recording workflows that work for real life. From choosing the right format to planning content you can actually keep up with, we focus on making social media feel doable again.
View our Social Media Strategy Services.
More Posts
-
What Is ClickUp Used For? An Honest Review
Project management tools are everywhere, but one platform that often comes up in conversations about productivity is ClickUp. This post is part of our learning web series written by Pixel Bridges’ Co-op Josh L. Businesses, students, and freelancers frequently recommend it as a way to organize work, manage projects, and improve team collaboration. But what…
-
What Is Encryption? A Simple Guide for Small Businesses
Running a small business means juggling many responsibilities, and technology often feels like one more thing on the list. One term you’ve probably heard is encryption. It sounds technical, but it’s something every business owner should understand because it helps protect your data, your customers, and your reputation. What Is Encryption? Encryption is the process…